Tuesday, April 15, 2014

Whats coming up........


You may have noticed the blog was unable to be accessed for a bit and I apologize. Maintenance needed to be made and well, being new to the whole digital thing it proved to be more daunting than I could have guessed….
I havent put down the yarn, in fact this lil gem was born today. I LOVE this piece and I am working up the pattern in the next few days so stay tuned. But for now this is just a sneak peek.
Ive made some decisions in the last few days…. made some growth and come to some realizations after in depth talks with my hubs…. I havent sold my hand mades for quite some time…. and my patterns will always be free yet Im ready to part with some of the goods I whip up while creating patterns. The lil number I made today is the first lil bit of yum on the block.
I just LOVE this totally functional corset…..

Friday, April 11, 2014

Sweet Lil Summer Halter ~FREE PATTERN~


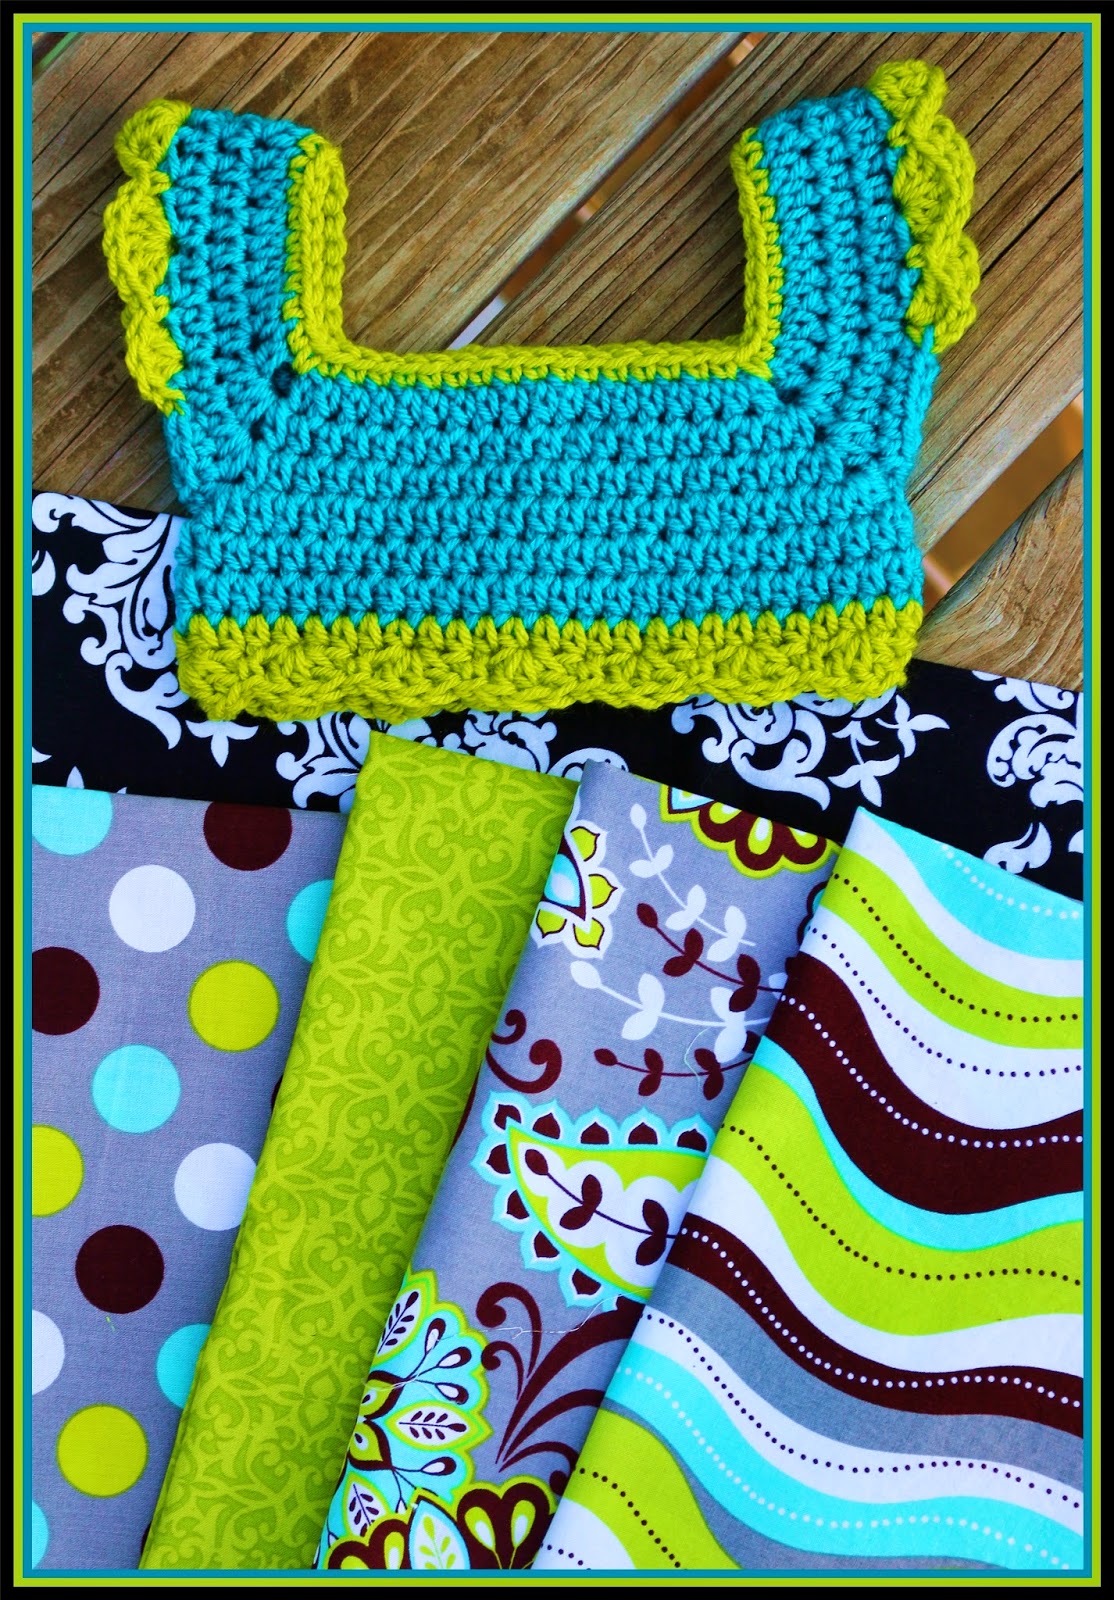
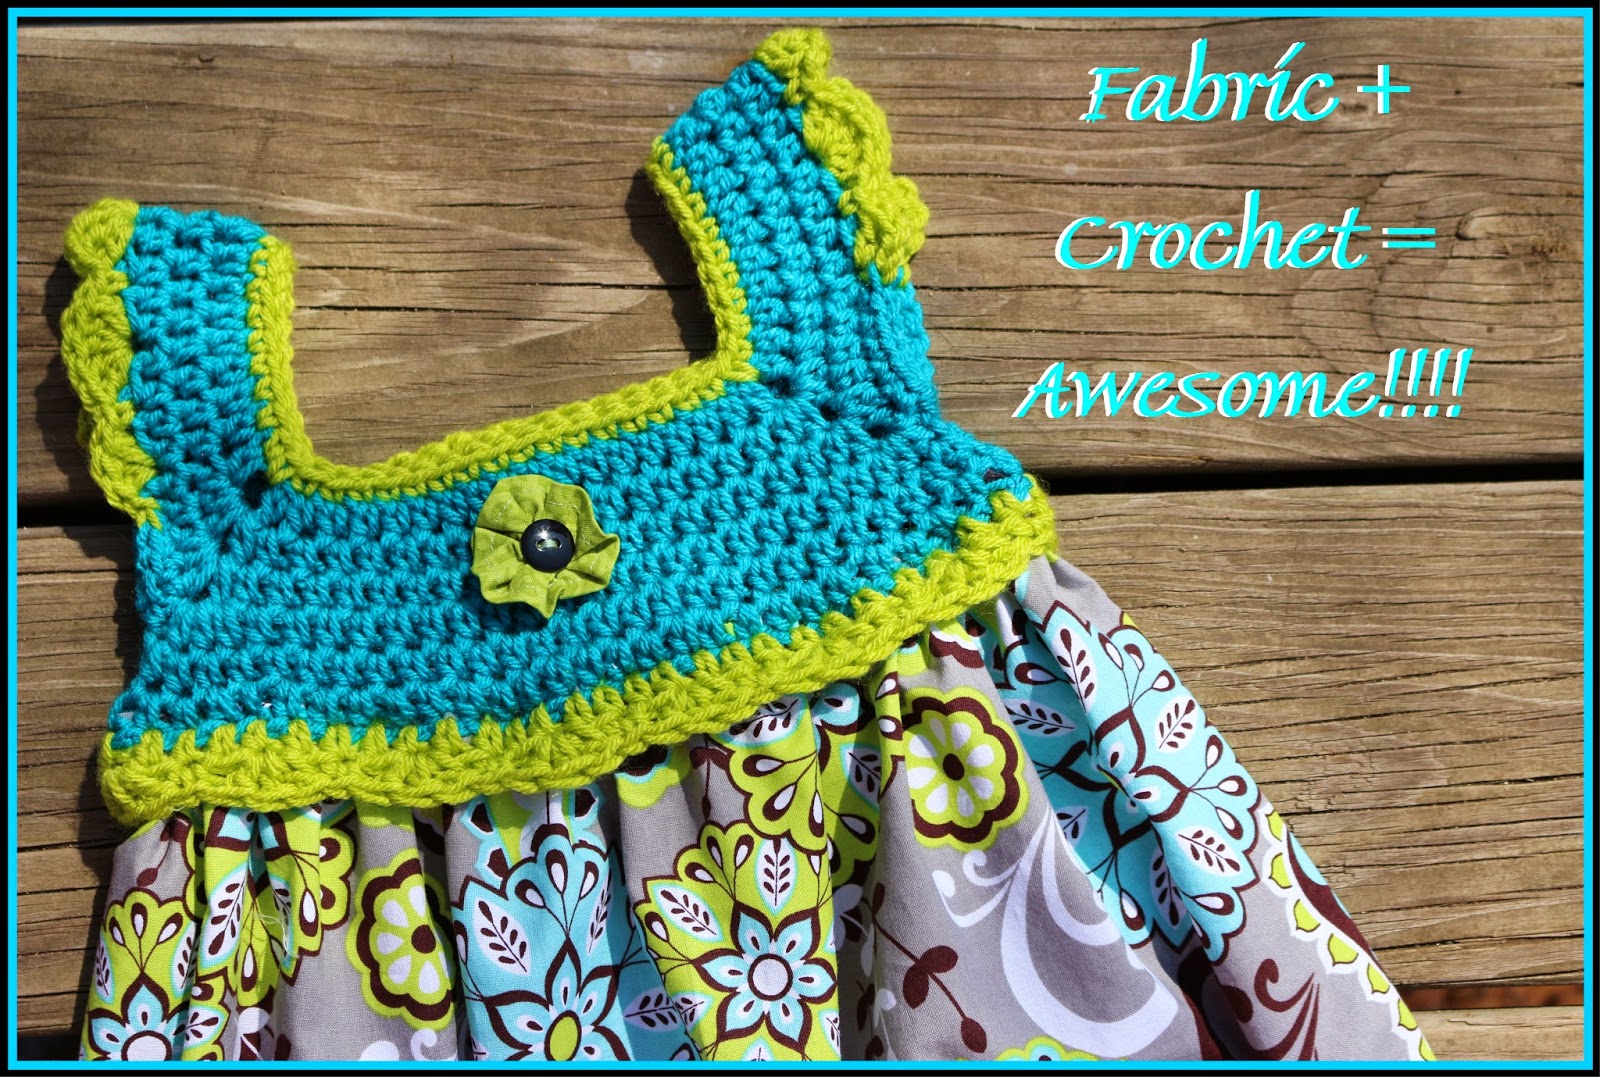
I received this yarn in the mail the other day. I had never used it before but have been looking at cottons for some projects I have planned for summer. If you havent checked out Lion Brand Cotton Ease ooooohhhhhh I beg you to do so. It has give, and beauty and texture that made me swoon and wish I had ordered more…. and so I did, but I digress :)) It seems to be THE PERFECT YARN for this project. And this project seems to be a gateway pattern to soooooo many other beautiful possibilities …..
This polka dot fabric I picked up at Walmart. It was the last lil sneeblit on the end of a bolt…. cost me $2.00
The beautiful snake skin like knit fabric I got from one of my favorite, ok strike that, definitely my favorite online fabric store….. www.fabric.com ….. you can find the exact fabric here…..
The beads I just bought at walmart and the whole look I think cost less than $10.00. My teen daughters love this look and I have to say I think even this plus sized mama of seven is gonna get in on this. I think a maxi dress with a  nice shrug and summer time here I come va-va-voom :P
I made the first of 3 videos and you can find it HERE….. Im still really soooooo not very good at them sigh….. practice practice practice. Also come say hi over on myFacebook page Strings and Things :)
Grab your stuff and lets get started!
Made a correction/adjustment to the back strap…. my older daughter wanted it tighter and she is a 36C so after fitting her these are the numbers I came up with. Please measure on yourself as each persons crochet tension and measurements are different for correct fit*
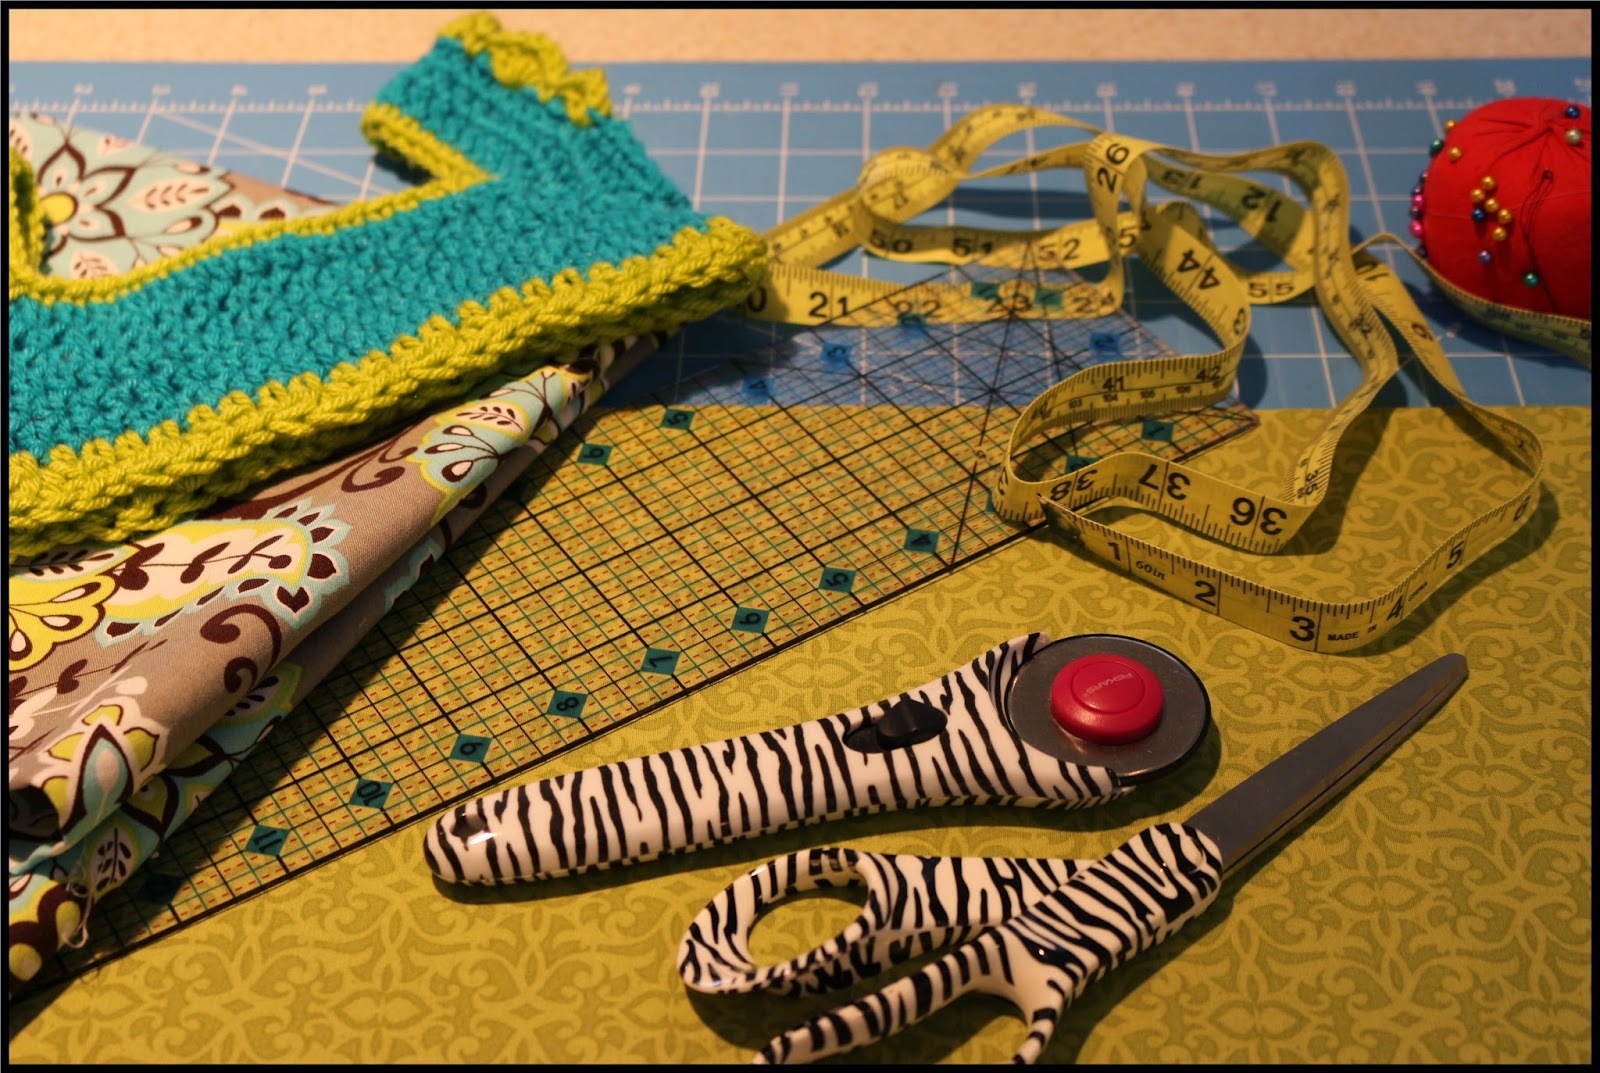
Materials:
Lion Brand Cotton Ease (1 skein) A scrap of color yarn for tie in the front
Size H hook
Beads (optional)
Scissors
Blunt eye needle
Large eye embroidery needle that can pass through beads on the ends of the ties like in the picture (optional)
This Pattern fits a 36-38 C comfortably
Chain 11
Row 1: SC in each stitch across (10 stitches)ch 1 turn
Row 2: SC in each st across (10 st)ch 1 turn
Row 3: SC in each st across (10 sc)ch 1 turn
Row 4: SC in each st across (10 st)ch 1 turn
Row 5: SC in each st across (10 st)ch 1 turn
Row 6: SC in each st across (10 st)ch 1 turn
Row 7: SC in each st across (10 st)ch 1 turn
Row 8: SC in each st across (10 st)ch 1 turn
Row 9: SC in each st across (10 st)ch 1 turn
Row 10: SC in next 9 st, 3 sc in last st, pivot work on its side and begin working down the edge of the crochet without turning. (21 st)
Row 11: Ch 1 turn. SC in each st around (21 st)
Row 12: Ch 1 turn. SC in each st across (21)
Row 13 Ch 1 turn. SC in each st across (21)
Row 14: Ch 1 turn. SC in each st across (21)
Row 15: Ch 1 turn. SC in each st across (21)
Row 16: Ch 1 turn. SC in each st across (21)
Row 17: Ch 1 turn. SC in each st across (21)
Row 18: Ch 1 turn. SC in each st across (21)
Row 19: Ch 1 turn. SC in each st across (21)
Row 20: Ch 1 turn. SC in each st across (21)
Fasten off.
Repeat for second cup of halter and do NOT fasten off on last row.
Joining the cups and the back strap…. please measure yourself….. you may be different than these measurements. See below on how to find your size.
Row 21: Ch 1 and turn. SC in each of the next 20 stitches. SC through BOTH end stitches joining the two cups. (41 stitches across the front) Next chain 55 stitches and join with a slip stitch to end of first cup. Ch 1.  This begins working in the round.
Rnd 1: SC in each stitch around.
Rnd 2: Ch 1, sk next st, sc in next st. Ch 1, sk next st, sc in next st….. all the way around. SC in last st before first ch 1 space.
Rnd 3: 2 sc in each ch 1 space around. Sc in next 2 stitches
Rnd 4: SC in each stitch around.
Rnd 5: Sc in each stitch around Slip st into next 2 stitches and fasten off leaving a tail for weaving in.
Across the back and up the sides of cup….
Beginning on the top of the band where the left cup and band join with right side of halter facing you, join new yarn in first band stitch. Sc in each stitch across top of back band and then in each stitch up the side of the right cup to the top. I like very long ties for decorative purposes so I chained 80 st…. but feel free to make them shorter or longer. Just make a note of the number of chains so you can repeat that same number on the other cup strap. fasten off leaving a 10 inch or so tail if you are going to have beads at the ends, if not cut tail short.
At the top of the right cup join new yarn in space made from last sc made at the top of the cup (where your chains for your long tie begin) and sc in each stitch down the inside of right cup to the V where it joins with the left cup. Sc all the way up the inside of left cup and at the top chain your tie. Again I chained 80 st because I like a long tie for decorative purposes but put the same amount of chains you chose for your first cup.
At the top of the left cup join new yarn in space made from last sc made at the top of the cup (where your chains for your long tie begin) and sc in each stitch down the outside of the left cup. Sl st into first 2 sc of the back band and tie off.  Weave in all ends, except the ends on the ties if you are beading them.
Halter is finished except for embellishments :)
Band Tie * I made my tie very long for decorative reasons, you can make yours what ever length makes you smile *
If you are beading the end leave a 10 inch tail and using a contrasting color chain 190 and fasten off leaving a 10 inch tail.
Beginning at the front center ch 1 open spaces (the 2 center ch 1 spaces, one left, one right) begin weaving by going into the ch 1 left space and weaving in and out all the way around coming out back at the front right ch 1 space. Tie.
The only thing left to do to the halter is put beads on the ties if you choose to do that, if not thats ok too :)
Attaching the bottom fabric……
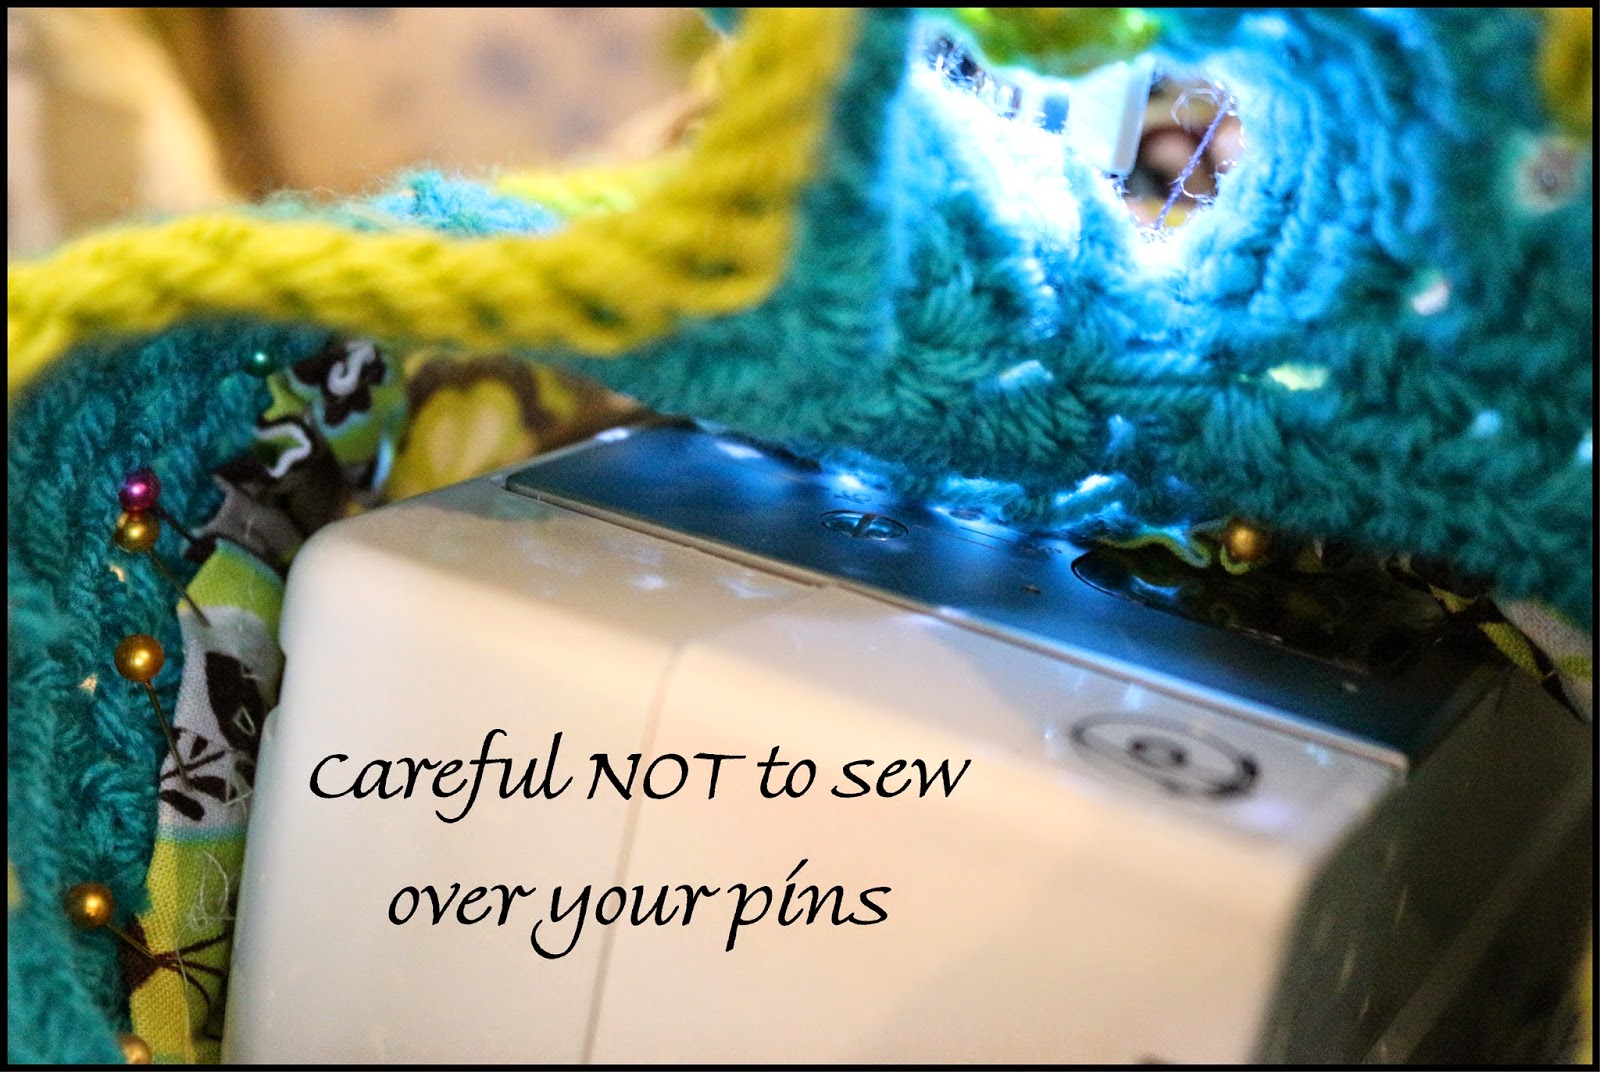
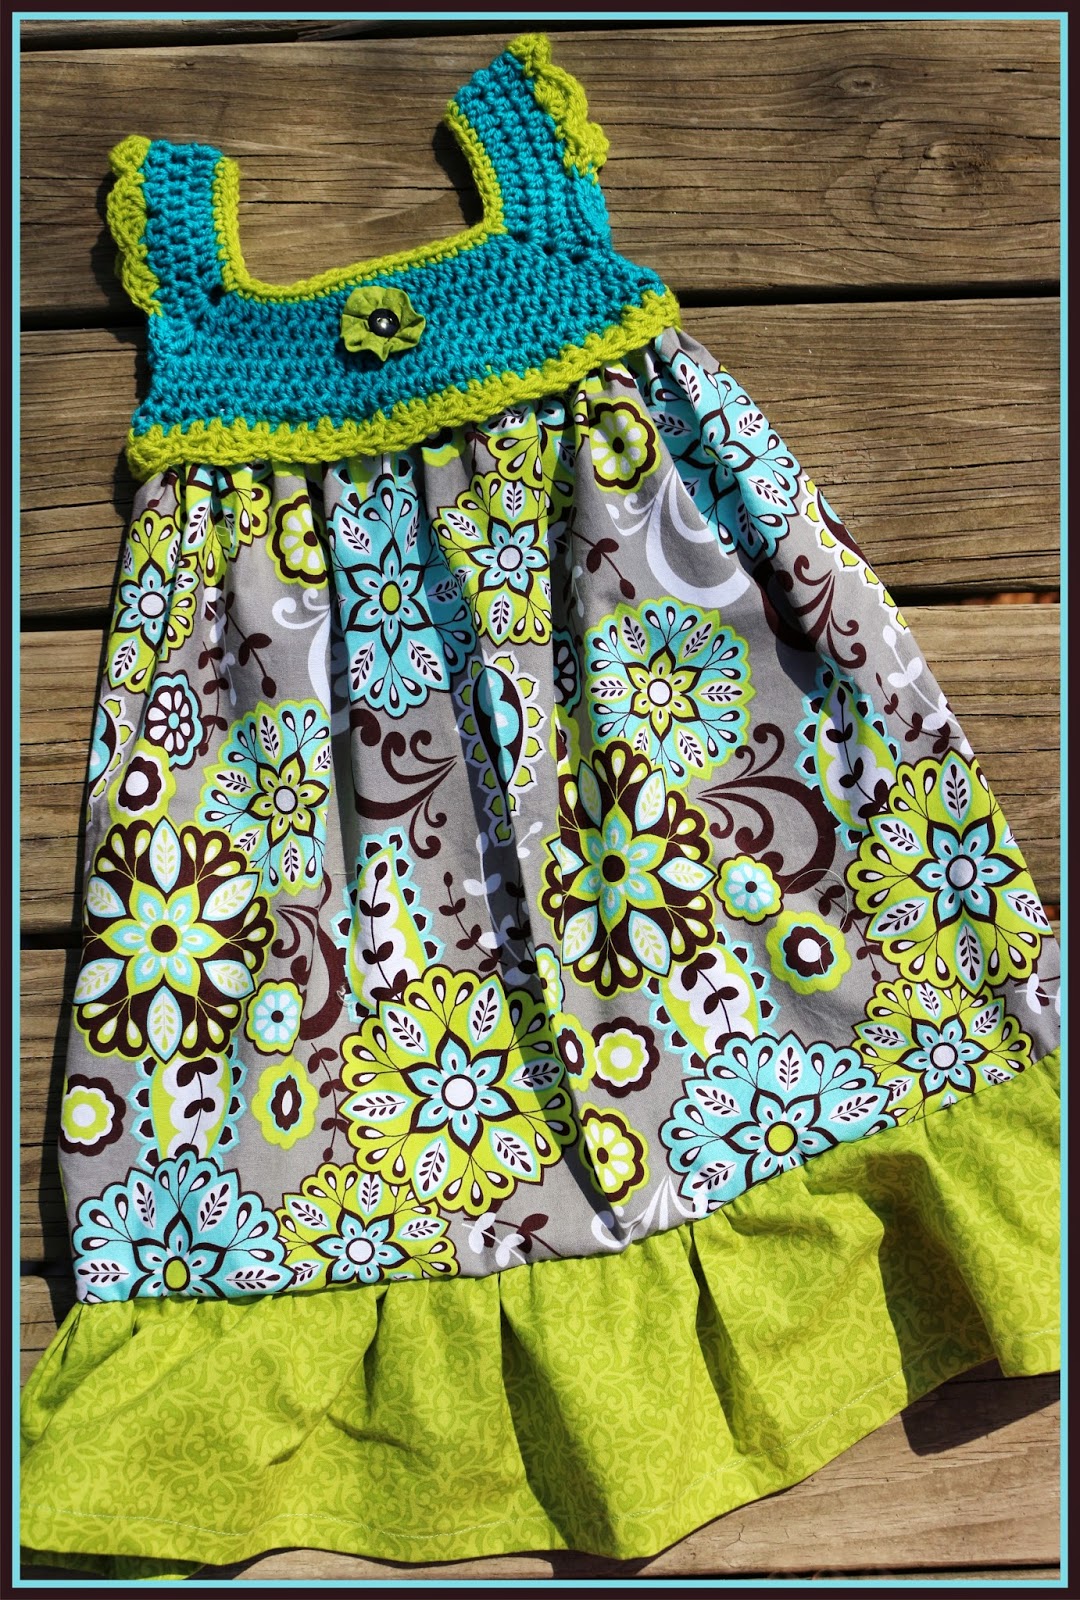
For the polka dot top I used a very thing silky light weight rayon fabric. I used my sewing machine to turn the ends as this type of fabric can fray awful but is way too pretty to pass up. For the grey snake skin dress I used a light weight knit fabric as knit doesnt fray and so finishing isnt needed like in other materials. Kinda like when you cut a tee shirt…. no hemming needed. Of course you can hem for a more finished look, but I wanted to show a very basic version just to give those who do not ave machines or the desire to sew a great alternative also :)
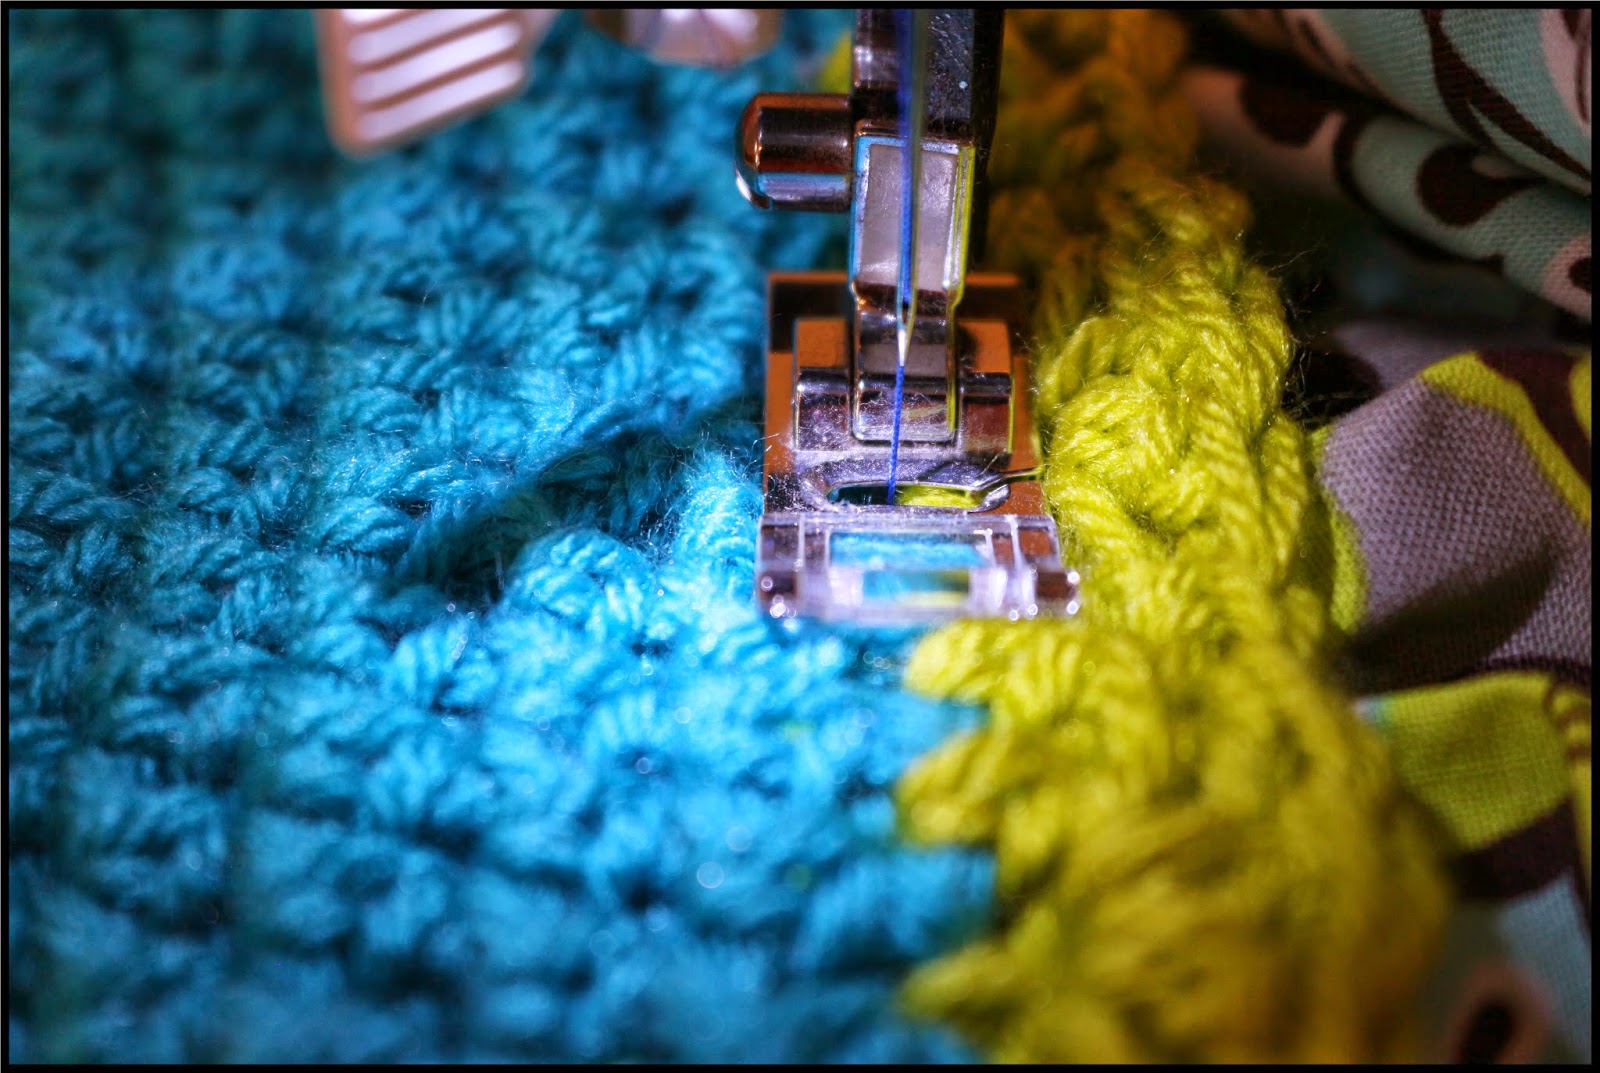
Measure the fabric 1.5 times bigger around that the band measurement of halter. With right sides together and a sewing machine or needle and thread in matching color to fabric, sew a simple running stitch up the length of the fabric (bottom edge to top edge) forming a “tube”.
With a large eyed embroidery needle thread same yarn as halter and make as many running stitches around the top of the tube as you have all the way around the bottom of the halter about 1/2 to 1 inch from the top edge of the fabric…..eg…. if you have 120 st on the bottom of the halter, evenly space 120 running stitches around the fabric edge. You should have visible to you 120 st on the right side of the fabrics edge *this was just and example*
For this pattern I will do 106 running stitches visible to me on the right side of the fabric.
If you dont know how to do a running stitch please go here and check this video out :)
After you have completed your running stitches take the left over yarn off the needle and use it to join with the beginning edge stitch on the bottom of your halter where you previously fastened off. Drawing up the yarn with your hook that was on the needle used to make your stitches. Begin to sc in each of the halter stitches and each corresponding run stitch space on the fabric. This will draw them up close under the halters edge and secure them beautifully and gather your fabric at the same time evenly …. Join with a slip stitch to beginning stitch and fasten off…..
weave in all the ends and you are done :)
Note on changing sizes…..
You want this measurement for the cup to be “tight”:
Measure across the fullest part of one cup (1 breast) and devide in half. In my pattern the cup size was 7.25 inches. I divided that in half and came up with 3.5 inches. Chain as many stitches that will equal that length +1 for turning. So mine was 10 Stitches +1.
Another example…. say your cup measurement at its fullest was a 9 inches. Divide that in half, so 4.5 inches. Chain enough stitches to measure 4.5 inches and then +1 for turning.
Do as many rows high as you have stitches long. For me this was 10 rows for 10 sc stitches. This makes he square. On the LAST row you want to put 3 stitches in the very last st and pivot just like in the above directions working down the side.  Say you had 12 rows, you would place 3 stitches in the last stitch of row 12, pivot and continue to stitch down the side for 11 more stitches and then continue on for the pattern.
Changing back halter strap measurement:
Measure with a soft tape measure around the back from outer edge of breast, around the back, to outer edge of breast. Now when you get to that section in above directions chain as many stitches as YOU need to obtain YOUR measurement. Continue on in pattern.
Please note I am NOT a professional pattern writer, just  agurl who likes to play with yarn :P If you do see something that you have a question on, please feel free to let me know so I can help and/or make a correction.

Thursday, April 10, 2014

The brightest version of your creative self :)

Why Crochet Supernova? I wanted a place that I could come to be inspired. A place to inspire others. A place to share and create and help each other grow as the craftastic artist we are...... to be the brightest versions of our creative selves. After all whats brighter than a Supernova? Its like 100 billion times brighter than the sun..... so sit back, join along and lets help each other shine <3

Stay tuned in here for projects and musings that arent, despite the blog name, only crochet related. I kinda like to think creativity sparks creativity. And sharing with each other helps growth. And if I know one thing its this: I havent met a crocheter yet that doesnt dabble, or wouldnt like to dabble in other forms of crafting awesomeness....

So get your gear ready, put on a smile, grab some chocolate and get ready to SHINE!


Sunday, April 6, 2014

Crochet + Fabric = AWESOME ~FREE PATTERN~


This morning I woke up with a thought.... I wanted to sew, but I didnt reeeeeaaaaallllyyyyy want to "sew". Out of my apathy came this..... and I love it :)

My little girl Miss Lilly~Anne is the baby of seven. Having seven kidlets can mean sometimes I dont get to spend enough one on one with each of them. Its the truth, I can admit it. Makes me feel like less than "supermom" and most days I just wonder where the heck is my Alice for this Brady Bunch???? One of the ways I have tried to find time with each is by making a special niche`... a "thing" that kidlet and I do together. For Lilly n me its shopping. That girl LOVES to shop. Shop for food, shop for toilet paper, window shop, garage sale.... she calls it "schop-it". Since we go once a week to the big city (ummmm we live in a town of 400 people so when I say 'Big City' Im talking roughly 10,000 people. That my friends to a four year old might as well be NYC) to do our household shopping together I have tried to make it special. I make Lilly whats called her "Friday Dresses". These are dresses I make during the week and on Fridays her and I get all gussied up to go paint the town with our fabulous fashion. Ok more like paint Walmart and Target but I digress. So here are a couple of Friday Dresses.... and today you and I are going to make one together. Get your gear and some choclate and Ill meet you back here :)

*This will fit a 3 to 4 year old. My daughter is 4 and kinda tiny, she has a 21.5 inch chest

MATERIALS:
H hook
Worsted Weight Yarn *I used I Love This Yarn!*
About a yard of fabric OR a beautiful pillow case for even less sewing
Scissors
A large eye blunt needle for weaving in ends
and any embellishments you might like..... flowers, buttons, rick rack, jewels..... the sky is the limit
Smile and have fun!

Crochet Bodice:
Chain 72 and join to beginning to work in the round making sure not to twist your stitches :)

Rnd 1: Ch 2. HDCin next 7 stitches. HDC, ch 1, HDC in next stich. HDC in the next 18 stitches. HDC, ch 1, HDC in next stitch. HDC in each of the next 16 stitches. HDC, ch 1, HDC in next stitch. HDC in, next 18 stitches. HDC, ch 1, HDC in next st. HDC in last 8 stitches. Join with a slip st to top of the chain 2 stitch.


Rnd 2: Ch 2 and HDC in the next 8 stitches. HDC, ch 1, 2 HDC in ch 1 space. HDC in the next 20 stitches. 2 HDC, ch 1, HDC in next ch 1 space. HDC in the next 18 stitches. HDC, ch 1, 2 HDC in the next ch 1 space. HDC in each of the next 20 stitches. 2 HDC, ch 1, HDC in next ch 1 space. HDC in each of the last 9 stitches. Join with slip stitch to ch 2.


Rnd 3: Chain 2. HDC in the next 9 stitches. HDC, ch 1, 2 HDC in next ch 1 space. HDC in the next 24 stitches. 2 HDC, ch 1, HDC in next ch 1 space. HDC in each of the next 20 stitches. HDC, ch 1, 2 HDC in next ch 1 space. HDC in each of the next 24 stitches. 2 HDC, ch 1, HDC in next ch 1 space. HDC in last 10 stitches. Join with slip stitch to beginning ch 2.

Joining Sleeves

Rnd 4: Chain 2. HDC in next 10 stitches. *HDC in the ch 1 space. Fold sleeve and match up current ch 1 space with next ch 1 space. SC through BOTH ch1 spaces.Turn project and continue on back side of armhole you just made. HDC in the ch 1 space.* HDC in the next 22 stitches. Repeat *-* HDC in the last 11 stitches. Join to ch 2.

Rnd 5: Chain 2. HDC in each stitch around. Join to ch 2. (Join new color here if you are using a contrast color)

Rnd 6: Ch 2. HDC in each stitch around. Join with slip st to chain 2.

Rnd 7: Ch 2. HDC in each stitch around. Join with slip st to ch 2.

Rnd 8: Ch 3. DC in same space as ch 3. **Skip one stitch, SC in the next stitch. Skip 1 stitch 3 DC in next stitch**.  Do this *-* around. 1 DC in same space as ch 3. slip st to top of ch 3. Fasten off.

Take the time to weave in all of your ends before the next step :)

Edging the neck.

Join the yarn in the yarn in the back of the bodice and begin to work SC in each stitch around. When you get to the arm go through the ch 1 space hole to make a neat finish. Continue this all the way around. Join with a slip stitch to beginning and fasten off. Weave in ends.

Armhole edging

Join yarn 8 stitches from the under arm and ch 3. DC in same joining stitch. Skip 1 stitch, SC in next stitch, (skip 1 stitch, 5 DC in next st twice), skip one stitch, DC 3 in next stitch, skip 1 stitch, SC in next st. fasten off.

Repeat for other arm.
Weave in all ends.
SMILE!!!!!!!

Onto the fabric :)

Measure from chest to the length you would like your dress to be and cut appropriately. (if you dont like a whole lotta fuss.... you can actually use a pillow case for the skirt bottom.... no hemming! Let me know if you would be interested in seeing how that is done)


Place fabric right sides together and sew up the back seam.


Fold over and hem, making sure to press all of your seams open, crisp and flat as you go. It will make a big difference in the finished project.


Repeat hem on top edge of skirt where it will be tucked under the crochet. Sew a basting stitch (Or running basting stitch if you are sewing by hand) along the top edge and gently pull on the thread to gather the fabric up to the same size as a stretched version of your crochet bodice.


Begin pinning.... at the back seam first, then the front, then each side. Fill in with more pins..............


And when you think you have enough pins.............

Pin some more :)))))


Be mind full of the pins when you are sewing and make sure to go very very very slow, removing each one before you stitch over it.


Stitch VERY SLOWLY just above the decorative trim line of your bodice.


And there you have it!

Crochet/fabric fun!!!!!!


There it is :)

Hope you have fun and give it a try ....

Pop on over to Strings N Things and show me what you make :) Get in on give aways and join in on the fun!


*please remember I am NOT a professional pattern writer, justa momma that likes to play with pretties :) Please if you see anything that is questionable bring it to my attention :)

Wednesday, April 2, 2014

Sugar N Spice Dress ~FREE PATTERN~


Yesterday I was feeling kind of blah and uninspired. I think Im going through a winter, extended winter, funk. We just cant seem to stop snowing here in northern Minnesota and its April! Any how last night I needed something sweet (and not of the food variety as I swear I have eaten my way through this entire season to ease the pains of cabin fever.) I needed something wee and pretty and something that made me feel warm n fuzzy on the inside..... and here it is. I call it Sugar N Spice cuz after all that and everything nice is exactly what lil girls are made of.

Hope you enjoy giving this pattern a try as much as I enjoyed coming up with it. Its very easy, I would even say beginners could do this. Have fun <3 I have done a video tutorial for this dress and it can be found HERE...... its a work in progress, but was a fun challenge. Also pop on by and join me on my Facebook page called Strings and Things :) and join our group page for fun with other crafters and artist called Crochet Supernova :)

*Note: I will be working in different colors than the pink and chocolate but it is the same pattern. Also, the pattern is for about a 3 months size. I will be adding notes on how to adjust at a later date.*

*Went over it and made some corrections and changes. People were asking if the bodice could be done in the round so there werent so many ends to weave in and I thought that was a wonderful idea! Please always feel free to correct or make suggestions to me as I am new to pattern writing and welcome and help making it a more enjoyable pattern for you all to work*


Materials:
Worsted Weight Yarn... I used I Love This Yarn! in pink and brown
Size H crochet hook (5.00mm)
A scissors
A large eyed needle for weaving in ends
A SMILE :)

Stitch Guide:
SC = single chain
HDC = half double crochet
DC = double crochet
TC = treble crochet
SL = slip stitch
Ch = chain

Let's Begin!!!!! :)

Leave a rather long tail, 8 inches is good, for weaving in ends

Chain 51 join in the round 

Rnd 1: Chain 2 and HDC in each of the next 5 stitches. HDC ch 1 HDC in next stitch. HDC in next 12 stitches. HDC ch 1 HDC in next stitch. HDC in next 12 stitches. HDC ch 1 HDC in next stitch. HDC in next 12 stitches. HDC ch1 HDC in next stitch. HDC in each of the last 6 stitches. Join with sl stitch to the top of ch 2.

Rnd 2: Chain 2. HDC in each of the next 6 stitches. HDC, ch 1, HDC in ch 1 space. HDC in each of the next 14 stitches. HDC, ch1, HDC in ch 1 space. HDC in each of the next 14 stitches. HDC, ch1 HDC in ch 1 space. HDC in each of the next 14 stitches. HDC, ch 1, HDC in ch 1 space. HDC in each of the last 7 stitches. Join with sl stitch to top of ch 2.

Rnd 3: Chain 2. HDC in each of the next 7 stiches. HDC, ch 1, HDC in ch 1 space. HDC in each of the next 16 st. HDC, ch1, HDC in ch 1 space. HDC in each of the next 16 stitches. HDC, ch 1, HDC in next ch 1 space. HDC in each of the next 16 stitches. HDC, ch 1 HDC in ch 1 space. HDC in each of the next 8 stitches. Join with slip stitch to top of ch 2.

Joining Sleeves:

Rnd 4: Chain 2. HDC in next 8 stitches. HDC in the ch 1 space, fold body to make ch 1 space to match evenly with next ch 1 space to make arm hole, sc through BOTH ch 1 spaces drawing them together to form arm hole, HDC in the ch 1 space you just joined and continue to work across the next stitches with a HDC in each of the next 18 stitches. HDC in the ch 1 space, fold last ch 1 space to match other ch 1 space to make arm hole and sc through BOTH ch 1 spaces joining them together. HDC in the ch 1 space  you just joined into. HDC in last 9 stitches. Join with slip stitch to top of chain 2.

Change color for waistband..... Join new color and......

Rnd 5 5: Chain 2. HDC in each stitch around. Join with slip stitch to beginning chain 2.

Rnd 6: Chain 2.  HDC in each stitch across. Join to begin in the round.

At the end of Row 6 change color to skirt color ........

Rnd 7: Chain 2. HDC in same stitch as joining. HDC in next 3 stitches, 2 HDC in next stitch all the way around. Joining with slip stitch to beginning chain. Chain 5.

Rnd 8: Treble crochet in same st as ch 5. TC in each of the next 3 stitches. TC, ch 2, TC in next.... all the way around. When u get to the end make sure there are 3 treble crochets before u join. Its ok if u have to double up here, the count of three is whats important. Chain 4.

Rnd 9: TC ch 2, TC in the ch 2 space. TC in the next 4 st. TC, ch 2, TC in next ch 2 space. Work this way all the way around to last 3 st. TC in last 3 stitches joining w a slip st to top of chain 4. chain 4.

Rnd 10: TC in next stitch. TC, ch 2, TC in the ch 2 space. TC in next 5 st. TC, ch 2, TC in next ch 2 space. Work this way all the way around until last 4 stitches. TC in last 4 stitches joining with a slip st to top of ch 4. Chain 4.

Rnd 11: Tc in next 2 stitches. TC, ch 2, TC in next ch 2 space. TC in each of the next 6 st. TC, ch 2, TC in the next ch 2 space. continue around to the last 3 st. TC in last 3 st and sl stitch into top of ch 4 st. Chain 4.

Rnd 12: TC in next st 2 st. TC, ch 2, TC in next ch 2 space. Tc in next 7 stitches. Tc, ch 2, Tc in next ch 2 space. Do this around to last 3 stitches. TC in last 3 stitches and sl stitch into top of ch 4.

Join the band color during the slip stitch into the last rounds chain 4. Chain 4 with new color and continue.

Rnd 13: TC in next 4 stitches. TC, ch 2, TC in next ch 2 space. TC in the next 8 stitches. TC, ch 2, TC in next ch 2 space. Do this all the way around until there are 3 stitches left. TC in last 3 stitches. Join with a slip stitch to top of chain 4. Chain 4.

Rnd 14: TC in next 5 stitches. TC, ch 2, TC in next ch 2 space. TC in next 9 stitches. TC, ch 2, TC in next ch 2 space. Do this around to last 3 stitches. TC in last 3 stitches, join to ch 4 with a slip stitch. Chain 3.

Edging Row: DC in same stitch as joining. skip 1 stitch, SC in next stitch, skip one stitch, 3 DC in next stitch repeat until u reach ch 2 space. 5 DC in ch 2 space,skip next stitch, 1 SC in next stitch, skip 1 stitch, 3 DC in next stitch repeat until you come to the last stitch. 1 DC in the same stitch as first ch 3. Cut and fasten off.

Take the time now to weave in allllllll your ends and stitch up the back of the dress. With back of the dress facing you join yarn in a stitch at the back of the neck edge and ch 1. SC in each stitch around neck. Fasten off. Weave in all ends.

Now on to the sleeves :)

With the back of your project facing you, attach yarn into the stitch BEFORE the under arm stitch on the left sleeve. Ch 2, HDC in each st around making sure to include stitch in the arm pit area of sleeve. At the end of the round join and change color for finishing the sleeve. Chain 1. SC in each stitch around and fasten off. Weave in all ends.

For the right sleeve attach yarn in the stitch AFTER the under arm stitch. Follow the rest of sleeve instructions as before.

Make 2 Curly Cues: Leave a long (8 inches) tail
Chain 30
2 SC in second ch from the hook and in each stitch across. Fasten off leaving a long tail (8 inches)

Making the Bow: leave a very long tail (24 inches) and with body stripe color
Chain 25
HDC in 3rd ch from the hook and in each across. Join contrast color and chain 2. turn.
HDC in each stitch across. Join w previous color and ch 2. Turn.
HDC in each stitch across. Fasten off. Leave a long tail for sewing and wrapping bow. (24 inches)

Fold in half so ends match up and sew together with blunt eye needle. Keeping seam in the back use yarn to wrap around and around middle to make the bow. tie securely.

Heres the flower pattern :)


When assembling do the curls first together..... then affix the bow/flower over them :)

Hope you enjoyed the pattern :) This dress measures 8 inches across the chest...... ******* if you are not getting 8 inches across the chest go up or down a hook size accordingly********


*please remember I am NOT a professional pattern writer, justa momma that likes to play with pretties :) Please if you see anything that is questionable bring it to my attention :)